self-portrait Montage our first studio project
Art 309, Art for Children, Fall 2002
Marvin Bartel, instructor

final product the critique printing instructions scope and sequence objective
back to assignments page Back to Art for Children Page
    Third grade at Honeyville Elementary, Topeka IN working on a "Portrait Collage" showing emotion and feeling. They are surrealistically pasting unexpected pictures on faces cut from magazines.

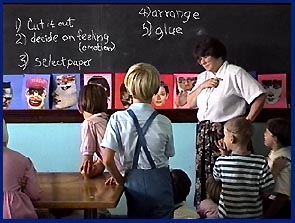
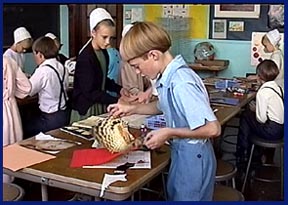
    Kim Lint, Goshen College student teacher.
    Rebekah Short, art teacher.

    Fall Semester, 1998.

photos © Marvin Bartel - 1998
D ictionary D efinitions :

" montage - A photographic image produced by the collage technique."

" collage - A technique of composing a work of art by pasting on a single surface various materials not normally associated with one another, as newspaper clippings, theater tickets, fragments of an envelop, etc."

Where To Meet first several weeks
(to be determined for Fall 2002)

What To Bring
For the 2 p.m. lab, bring some small objects, pictures, photos, words, paper, magazine clippings, bits of cloth, memorabilia, and so on that you might be able to use in a collage-like arrangement about yourself. The scanners can make digital images from anything small enough to lay on top of them (legal size paper size). The scanner works about like a color photocopier. We will also have a digital camera there to make images of anything too large for the scanners.

Photographs To Make
In the first session, you will each take four pictures of yourself with a digital camera (others in your group will help). The four pictures allow the comparison of four common types of light.

  1. Make one exposure in sunlight.
  2. Make one exposure outdoors in open shade or under an overcast sky.
  3. Make one exposure indoors with the built-in flash.
  4. Make one exposure indoors beside a window so that the window light (not sunlight) falls on one side of your face.
When you see the four images on the computer screen, you make a choice about the one to use. Artists make many choices.  One or more of these photographs, or one you bring, will become part of your self-portrait montage. We play the Conversation Game in class to generate additional ideas for this project. What is Learned in the Process
Unlike some subjects, many feel art is an ill-structured discipline.  When learning a complex discipline like art, many learning instances are needed.  Learning art is a bit like looking a strange landscape.  It is easy to make mistakes about it if we only look from one direction.  Only by walking through the landscape, and seeing it from many perspectives can it be understood.  Much of what we learn in art is learned during the process of making art. We have to walk through it many times to understand it well.

Many think the final product is the reason for making art.  Even most professional artists are not as interested in the final outcome as they are in what they can learn during the process.  The process is a search, an experiment, and a quest.  These are some of the questions to ask yourself in order to become aware of what you are learning during this art making process.  Artists answer these questions for themselves by trying various options until they cannot think of any other ways.  When art students are in a class, they often check with each other and with with instructor.

  1. How can I communicate ideas visually?
  2. How can I communicate my values visually?
  3. How can I communicate my feelings visually?
  4. How can I use symbols and visual metaphors to communicate?
  5. How can I create emphasis, unity, depth, repetition, etc. to be more effective?
  6. How can I make this say something about who I am?
  7. How can I learn new skills or how I achieve mastery of older skills?
  8. How will this work help me learn to help others learn art (how to teach art)?
Final Product
  • The final compositions will be color laser printed and used as the Cover Art for your sketchbook/journal binders used in this class. We will learn how to attach the computer printout to the cover of our sketchbook/journal in class when we meet in Visual Art 20, week three.
  • Additionally, this composite photo montage may also be used as an illustration for a web site about your own teaching interest and experience. You can post it on the Internet. If you didn't know you have a personal web site, take a look at it now.  Go to:

  • https://www.goshen.edu/~your e-mailname/
    Use your actual Goshen College e-mail name in place of "your e-mailname" above. You will see a web page waiting for content provided by you. In the above URL, be sure to precede your email name with the ~ mark (top left of keyboard) and don't include any spaces.

    Today's schools are actively looking for teachers who are not afraid to creatively use technology in the classroom. Since many current teachers have been too busy or unwilling to learn new skills, the schools are looking to their new teachers to bring them into the computer age. Goshen College makes it easy to use a Mac to drag and drop web pages to your personal web site. We are finding that students who have achieved some degree of technological mastery with their own web sites have had better teaching job opportunities.


click for Scaning Instructions
click for How to use Layers

Printing Instructions

    This link is specifically for the Mac Lab at Goshen College . Other computer labs may differ. Additional instructions are given in the studio session, or from the student assistant who knows Photoshop and Macintosh computers.

Scope and Sequence (the main steps)
  1. Make four image files of yourself using a digital camera.
  2. See this page to help improve the photo of yourself.
  3. Develop content ideas and concepts about yourself.
  4. Scan in personal objects, etc. for additional content using flatbed scanners
  5. Manipulate, combine, and compose the work using Photoshop.
  6. Color laser print the work 7.5 inches wide and from from 5 to 10 inched high.
  7. Adhere the work to the cover of the sketchbook/journal.
  8. Discuss the designs.
  9. Learn to convert it to a web page including text.
  10. Learn about similar artwork done by at least one famous artist.
  11. Learn about similar artwork done by at least one artist from another culture.

Goals/Objectives of this Project (art lesson) Content Objectives
You will use your own image and images of things, persons, objects, words, etc. that are in some way significant to you. This link describes a method to come up with ideas for content.  The goal is reveal something about who you are and what you care about.  In art education we also use the terms: Subject Matter and Topics to describe this objective.

Composition Objectives
In Photoshop is it possible to change the size and many other attributes of any part of the composition.  Use size to as well as other attributes to modify the importance of components of your composition.  It many cultures size distortion in art is standard way to represent relationships reflecting the importance of parts of a composition.  Generally something that is to be more important can be shown as larger so that the viewer notices it more.

Everybody immediately responds to subject matter in art. A picture of a butterfly and a picture of a snake do not get the same response, but they both get response. In addition to subject matter, in this assignment you are to create unity and harmonious variety in composition. This will be done through the use of design principles applied to the visual elements .

The Visual Elements (art elements) are: (see the Composition and Design page for details)

    Color - Line - Shape - Value (light and dark tones) - Volume (form) - Texture
The Design Principles or rules (some creative artists purposely break rules) are:
  1. Emphasis - some say "Center of Interest." Most artists put it a bit off center. Some artist avoid it on purpose. They want all parts of the work to be equally interesting.
  2. Harmony - complex but pleasing visual combinations are harmonious.
  3. Unity - when nothing distracts from the whole you have unity. Unity without variation can be uninteresting - like driving through western Kansas on the interstate.
  4. Balance is the consideration of visual weight and importance.
    • Symmetrical balance implies that both sides are the same. Gothic cathedrals are often symmetrical with their central emphasis pointing to heaven.
    • Asymmetrical balance is more interesting. Both sides are the similar in visual weight but not mirrored.
    • Radial balance is not used much, but it is like a daisy or sunflower with everything arranged around a center. Rose windows of cathedrals use this system.
  5. Depth - effects of depth, space, projection toward the viewer add interest. In the real world atmospheric perspective causes colors and shapes to get blurrier and foggier in the distance. Linear perspective in the real world makes things look smaller in the distance. Some artists try to avoid depth by making large things duller and small things brighter, and so on, to make the objects contradict realism. Many artists don't believe in realism even though they could do it if they wanted to. It seems too boring to them. Realism wouldn't be art for some artists.
  6. Variety - You create variety when elements are changed. Repeating a similar shape but changing the size can give variety and unity at the same time. Keeping the same size, but changing the color can also give variety and unity at the same time. In visual composition, there are many ways you can change something while simultaneously keeping it the same.
  7. Repetition - Some ways to use Repetition of the Visual Elements are:
    • Size Variation can apply to shape, form, etc.
    • Repetition can be used on all of the Visual Elements.
    • Variation can be used with all of the visual elements. See "Variety" above. You can do this with all the elements. Artists do this all the time.
    • Transparency and overlapping in varying degrees can create depth and connections.
Here is a page of the most used PhotoShop techniques for this project.

Style Objectives

There are many styles (aesthetic stances) in visual art. Most artists develop very personal styles much in the way we each develop unique handwriting. There are few broad style categories that include almost all art. Laura Chapman* attempts to simplify this by listing four styles under which all others can be listed.
  1. Expressionistic
  2. Realistic
  3. Formalistic
  4. Fantastic  -  This assignment is done in a fantastic style. It is commonly called Surrealism. In this style you are to juxtaposition things that could never be seen this way in our waking world, but maybe in our dreams. In this kind of art you can levitate, be a super hero, experience unimaginable joy, pain, or grief. Microscopic things can be huge and the largest objects can be hardly visible. You can travel through time and space. You are only limited by your imagination and your willingness to play and experiment.
Art History Objectives
You will learn about at least one well known artist who creates collage or montage and works surrealistically (fantastic style). This link describes a "WebQuest" portion of this assignment portion of this project that is designed to assist you in learning to teach art history. This work will be shown to the class after the project is completed.

Multicultural and Diversity Objectives
You will become familiar with at least one well known artist who is not a member of the majority in United State culture. This artist(s) creates collage or montage and works surrealistically (fantastic style). This work will be shown to the class after the project is completed.

Technology Objectives
You will become more familiar with the use of computers and digital image creation and manipulation as art medium, as art process, and as art form.  This project gets us into the use of
Selection Tools, Cutting and Pasting, Layers, Filters, and Transformations.  While the tools and commands are great fun to use, we want to look for ways to create meaning and feeling in the work. Here are some ideas:

  1. Can we use unexpected size to add importance to parts of the composition?
  2. Can you make certain parts of the image in full color and make other parts in black and white in order to add emphasis, mystery, or an old/new look?
  3. Can you combine parts from more than one image in order to create surreal juxtapositions that questions our assumptions about reality?
  4. Can you use PhotoStop filters to contrast an artistic effect (i.e. a drawing look) that is used for part of the montage while another part is very realistic in order to stretch the expected boundaries of photographic presentation?
  5. Can you change the scale or perspective in certain areas to create a surreal effect to show humor, fright, or another emotion?
  6. Can you invent a different approach (your choice) that could not be easily achieved by simply cutting and pasting pieces of paper in a collage.
  7. In addition to using the final product as a cover design for your course sketchbook-journal this assignment can be used as an image file on your own web page.
Art Education Objectives
How does this project help us become better art teachers? We are currently studying Chapter 3 in the Simpson, et.al. text. In "Cultivating Artistic Behaviors" the authors emphasize that visual forms and art materials can be employed by us and our students to produce feeling and meaning. This project cultivates of our own artistic behavior. As we work on this project, we can use it launch our creative ideas for teaching. While working on this assignment, we can gain experience and become more familiar with ideas, materials, and technologies that can be used to cultivate artistic behavior in the classroom (with modifications appropriate to the student's age and experience). EXAMPLES:
Some art educators and art teachers hesitate to show examples of finished projects before students do their creative work. As your teacher, I feel that looking at another artist's work could hinder your creative thinking if it solves a problem before you solve it yourself.

Many art teachers do "image flooding" as their way to introduce a new assignment and help students visualize the end product. It works to get better products. I am not convinced that it is a good way to teach thinking. It is a good way to teach, "monkey see, monkey do", but this does not seem like an appropriate way to learn art, which in our society is not art if not creative.

Imitation may be the most common learning style for children, but they probably don't need training in how to imitate. Who needs a teacher for that? There are other learning styles that are often much more useful in coping and solving the problems of living in today's world.

Instead of showing you examples of self-portrait montages, you may look at these two examples of web pages that I made by placing real objects on a flat bed scanner.

This is my Acorn page
"Planting trees is a good thing"
http://www.bartelart.com/acorn.htm

This is my pottery tool page
"One out of four women in the United States have worked in ceramics sometime during their life." According to Michael Feldman's "What Do You Know? -- Not Much" radio program quiz.
https://www.goshen.edu/art/DeptPgs/tools.htm

Sometimes the Photo Communications class does a similar Self Portrait Composite assignment. You may recall seeing these in the Leaf Raker display cases from time to time.

The Critique


This scene is at Honeyville Elementary School, Topeka, IN, fall, 1998.  They are discussing their surrealistic collages of faces created to show feeling (emotion).

In this photo, student teacher, Kim Lint, is conducting a critique with third graders who have completed their montages. Art criticism is not a time to look for failure. The critique is a time to review vocabulary, describe the emotions shown, analyze the methods used to produce feelings, and to interpret the works. Because the discussion is about the children's own work, it is one of the best learning moments in the art lesson.


See Footnote 2 below


Footnote 1:
* Laura Chapman. Approaches to Art in Education, 1978. © Harcourt, Brace Jovanovich, NY. pp 46-52.

Footnote 2:
From the Goshen  News , page 1, January 14, 2000: ". . . 100 percent of Honeyville third-graders scored above the state standard in last fall's Indiana Statewide Testing for Educational Progress." Most teachers and parents in Indiana know these as the ISTEP tests. It is exceedingly rare for a whole grade to score this high.

Click here to read more about this highly successful art program.

Art Ed Links annotated
Art Lesson Examples
Art and National Tragedy
Art History WebQuest
Game to get Ideas
Creativity Killers
Creativity Links
Creative Teaching
Montage Lesson
Cubism Lesson
Drawing Lesson with viewfinders
Drawing Lesson with blinders


Visit These
Art Education Links
by the instructor
********************
Drawing is Basic by Unsworth
Everyday Life Art Choices
Good and Bad Art Teaching
Learning to Learn to Draw
Lesson Planning
Multicultural Art
Observing in the Art Room
Rituals in the Art Classroom
Rubric - Assessing Artwork
Rubric - Assessing Art Talk
Sixth Grade Sketches
Sketchbook Evaluation


Sources of Inspiration
Successful Third Grade
Syllabus - Art for Children
Syllabus - Secondary Sch Art

Search Goshen
|  Marvin Bartel Home
|  Marvin Bartel Courses
| Art Department
| Art Gallery


Postscript:
Students in Art for Children class are invited to send the instructor ideas, suggestions, concerns, and questions about this lesson and anything else about this course. e-mail to: marvinpb@goshen.edu

All rights reserved. Goshen College students may print a copy for their own use. Others must e-mail marvinpb@goshen.edu for permission to reproduce or publish. Photos, layout, and text © Marvin Bartel 1999

final product the critique printing instructions scope and sequence objective
back to assignments page Back to Art for Children Page

Updated September 8,  2002