|
Learning from the Clay
The video is not about clay. It shows only two of many different ways to join pieces of clay.
OTHER CONTENTS ON THIS PAGE |
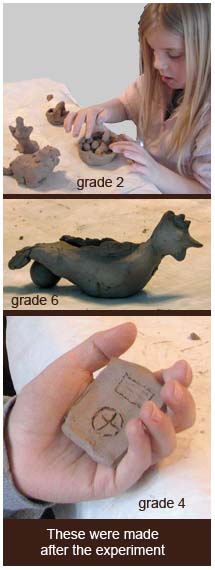
An art teacher from Texas wrote this question: How do you get students (especially younger ones) to grasp the concept of blending the clay in order to attach it well? I've told them a zillion times, I've modeled it, I've shown examples of ones that have fallen apart, etc. I've been trying to catch them before they put them on the drying tray, but it's simply impossible to catch every single project. Is there some trick I'm missing here, or is it really a learn by experience kind of thing? ---------------------------------------------- With clay, touching is essential. Clay gives kinesthetic pleasure. It is so easy to forget oneself in the trance of creative work. It is multi-sensory and more tactile than nearly any other material. I have been a clay teacher since 1960 and have coached every age from 3 to older than me and experimented with many approaches. I have concluded that clay should be in every student's hands before I start any kind of instruction. This way I can see them doing their own experiments rather than watch me show them my way. For very young children, I let them do as they wish without any instruction. They approach everything with a good instinct to experiment to learn about it. TELL me and I forget. SHOW me and I am entertained. Have me DO IT and I remember. For school children, since many have lost much of their freedom and imagination, I give them experiments to do before they make projects to be fired. Generally, school and other adults have taught them to expect to be told what to do, how to think, and what to learn. It can take some effort to restore instinctive learning joy for many of these children. I find that even potter's wheel learning is better when I teach in front of a circle of wheels where every student is doing it and I can see them all doing it as we work our way through the more challenging parts until everybody has the kinesthetic FEEL of what works as well as the feel of the things that do not work. I teach the wheel to any age from kindergarten on, but I would not recommend it for elementary school unless you have a skilled potter who understands learning. Clay sculpture is great for toddlers that can be supervised to keep it out of their mouths. Of course clay can be sterilized with heat, so tasting it would not be a problem. Some cultures use it in cooking. Many of our pills use sterile clay to bind them. I LEARN to DO a new skill by DOING it. A Basic Experiment for handbuilding or sculpture 1. Everybody starts by making four pieces of clay. Sometimes these are slabs, sometimes coils, or sometimes lumps for sculptures. Other Clay Experiments Try having each student write down a prediction or speculation of what they think might happen. At the end, have them write down and draw what actually happened. Clarify the cause of what is discovered. Consider having experiments done by small teams so students can help each other and so they can compete with other teams for discoveries.
2. Another experiment has them attach a slab that is very thin (about an eighth inch thick) to a slab that is about a half inch thick and see what happens as this experiment dries.
4. Another experiment has solid sculptures (at least 2 inches thick) in the bisque fired containers, but some of the pieces have had holes pushed in from the bottom with a piece of coat hanger wire at half inch intervals before the clay dried. See which ones explode in the firing. I welcome your questions and ideas about teaching art. I cannot promise to answer every question, but I am interested in hearing from you. contact ----------------------------------------------------------------- All rights reserved. Images, text, and design ------------------------------------------------ More links with similar help for art teachers. CONTACT HOME for teachng art links by same author Learning to Learn (process vs product) © 2008 Biographical information about Marvin Bartel Teaching Creativity Creativity Killers Make Drawing Easier and Harder (shows blinders) The Conversation Game to Get Ideas Art Lessons That Show Exemplars After the Media Work |
Why Should We Fire Every Piece? If a child makes three pieces before they are fired, it can provide a great choice-making process. Students can discuss the merits of their work with their peers prior to selecting one or two of three to be fired (one or two to be soaked and reprocessed as clay). This process provides a chance to learn mutual respect and empathic sensitivity. An Alternative Clay Sculpture Method Experimenting More Promotes More Self-Learning back to top of page ^ Sometimes I add sand to my clay. The white silica sand from the lumber yard is cheap and works okay for me. 5 to 20 percent sand can add character. More sand allows thicker pieces to be fired. Common sand sometimes works, but to know for sure, experiment. Some sand has ingredients that cause breakage after firing. This is tested by firing and then spraying a little water on the pieces to see if they crack or get pop-outs. Clay Prospecting & Preparation as Learning This is my SELF-DUG CLAY link:
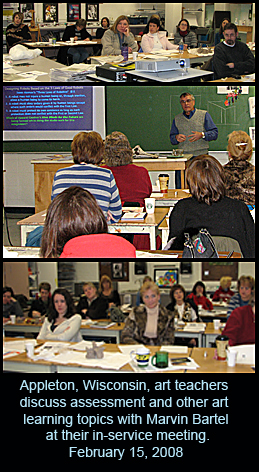
Contact Bartel to schedule an in-service
|