Site design process and production
Goals:
- Wait until the last possible minute to freeze design decisions
- Maximize freedom to "try out" different designs
- Lavish communication with your client during the development process
The model of the site design process that's presented here is based on that used by Lightsky Design (who employs several graduates of this class and this college!) In brief outline...
1.) Settle on the purpose of the website
What are the goals of the website, and who is your audience? Would you like people visiting your site to...
- buy something?
- get a good impression of you or your company's product?
- be able to find information on some topic of interest?
In years past this class has used things like
this questionaire about the kind of info folks might be interested in looking for in an on-line academic catalog in order to re-design that page. Here is the
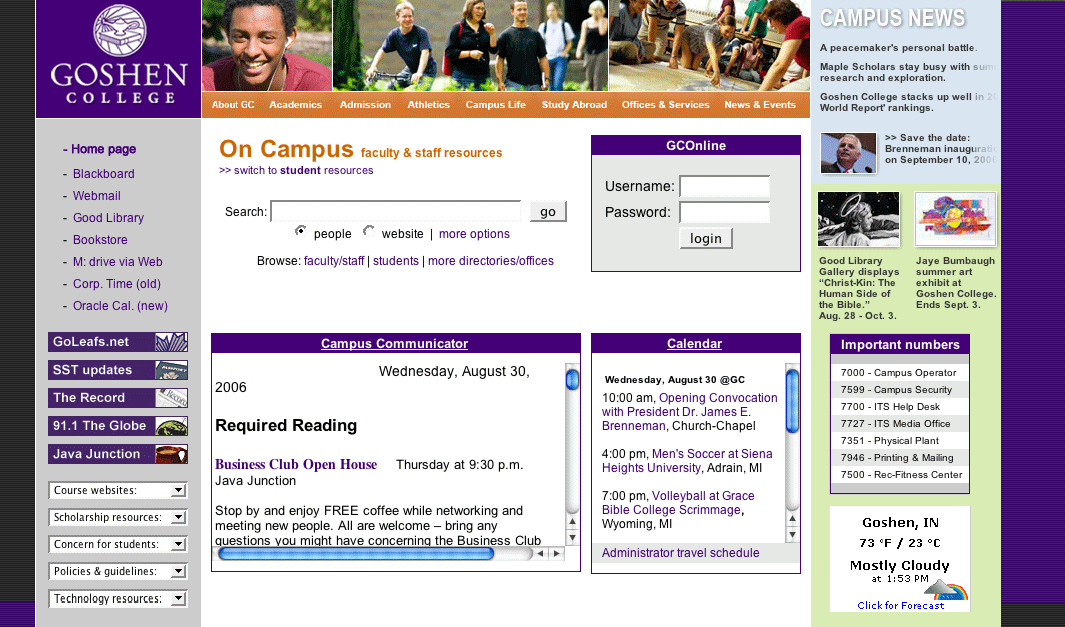
current Catalog and the
old Catalog (screenshot).
2.) Decide the information architecture of the website.
This can productively be done on paper index cards, or as a small, text-only, no-frills website (project #1).
Instead of building fully-functional pages to try out your ideas, Find existing websites that embody different approaches. E.g. News and Info pages:
- Until recently, AMBS put a few news items on their home page, but had no dedicated news page.
- Tri-State's News page features their own press releases.
- Colby College's News page features coverage of Colby by other news outlets ahead of its own press releases.
3.) Design the appearance of the website
- Make
sketches on paper, or in Photoshop
- This is also the time to
fill in navigation details
... to
set a tone, to support the information organization. This stage
includes both the graphics as well as details of navigation. Sketches
can be made on paper. One trick is to design in black and white, and
only later fill in colors. You can move things around in Photoshop
much more easily than with your HTML codes.
Oncampus page
redesign sketches #1
and #2.
4.) Build the site.
Finally, you're ready to put it all together and translate those designs into HTML tags and digital images.
5.) Publish and publicize your site.
Get a link from another part of your host site. Register information about your site with a search engine. Review server logs.