Lab: optimizing graphics
It's a challenge in working with images on the web: One would like to show people gorgeous, large graphics, with lots of detail, but good quality and large display size also mean larger file sizes, and thus slower download times. We've dealt with making graphics smaller (thumbnails). Today we'll see what other 'knobs we can turn' in the process of creating gif and jpg images in Photoshop.
The traditional wisdom is that the 'gif' format works best for images with a limited number of colors, and the 'jpg' format works best for photographic images with many colors and subtle color gradients. In this lab, we'll experiment with image compression methods on two images, examining file sizes and qualities resulting from a wide range of techniques.
Your lab page will show four images:
- A .jpg and .gif version of the "fox text" image
- A .jpg and .gif version of the "Chinese wedding" image
Additionally, you'll write up, for each image, what settings you used to save the file, and what the resulting file size was.
Readings
 pp. 88,89
Image with few colors
For the first image, download this png-format image of text on a two-colored background.
For this fox text image, experiment with the various 'gif' options (see below) save a copy of the image with whatever options you feel give an 'acceptable' image quality with as small a file size as possible. Then, save a copy of the image with whatever 'jpg' options you feel give the best compromise of file size and image quality.
Create a web page and insert the two images onto the page. We won't bother with thumbnails this time! Write a caption for each image saying what options you choose, and the resulting file size. Indicate whether the 'gif' or 'jpg' options worked out best for this image. Which of these two images ended up smaller overall?
Photographic image
For the second image, download this photo of Kent's 'wedding'.
As with the fox text image, try various 'gif' options and 'jpg' options, and save the one of each that you feel represents the best you can do. Add these two images onto the web page you started above, and caption them with options and filesizes.
In the end, you'll have a web page with four images and descriptions of each. Hand it in, that is, e-mail the URL to Paul.
Optimizing images
We'll use Photoshop to optimize images for the web. For each image, you'll
- open an image in Photoshop (File | Open),
- go to File | Save for Web,
- if it's not already selected, click the 2-Up tab, which will display the original (non-optimized) image beside the one you're experimenting on.
- try out the various JPEG and GIF image options below and particularly, of how the file size and image quality are changing..
- When you've got options you like, click "OK" and tell Photoshop where to save the image. Make a note of the settings.
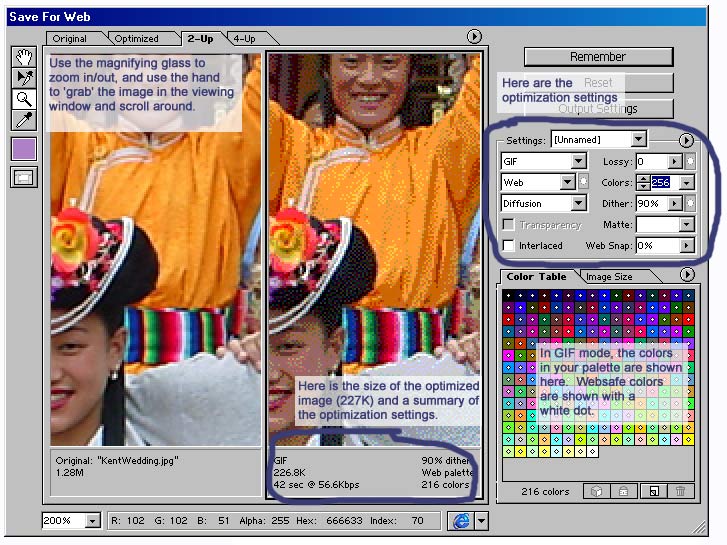
The Save for Web dialog box looks like this...
JPEG options
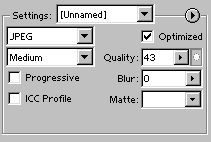 The main thing to fiddle with is the Quality Setting. With JPEG format selected, and blur set to '0', try out the effect of the Quality setting (a number between 1 and 100). Take it all the way down to 0 or 1 and notice what kind of distortions you get in your image. Then go to higher numbers until you get a decent image quality.
'Medium', 'High', etc. are only shortcuts to specific Quality settings, and take a back seat to the Qualilty number you select.- With a moderately high quality factor (say, 65 or so) try varying the blur. What effect does increasing the blur have on the file size?
GIF options
In GIF mode, Photoshop has several different choices for picking which colors out of the 16 million possible ones to use in its 'palette'. (The tool tip for this option is 'color reduction algorith'.) The main ones to consider are: Selective chooses the, for example, 16 most common colors in an image; Adaptive chooses 16 colors which represent some kind of averages of the most common colors, and these 16 may or may not be in the original image; Web chooses e.g. the 16 closest colors in the websafe palette. (Remember, Paul advises that you do *not* worry about sticking to "websafe" colors anymore.)
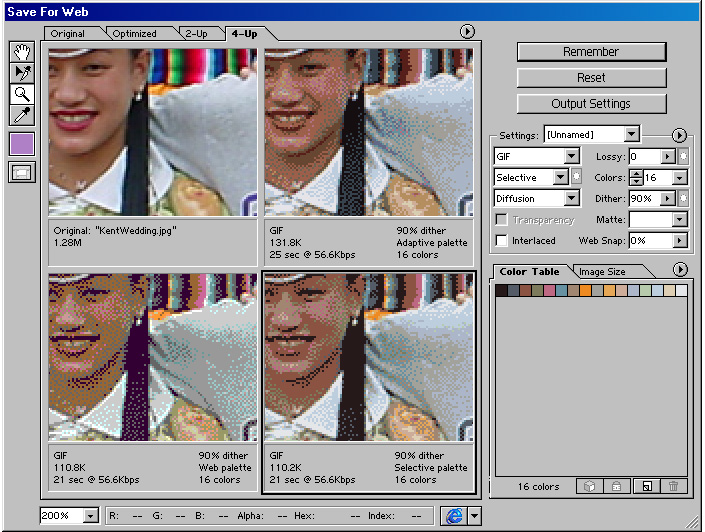
For the two images in this lab start with a diffusion dither set to 90%, and the Adaptive web palette, and 16 colors. Then vary the following three quantities in search of the best file size and image quality:
- Try out the two color-reduction options of Adaptive and Selective.
- Run the dithering up and down. The '0%' setting means no dithering at all, and corresponds to what we described as pure color 'mapping'.
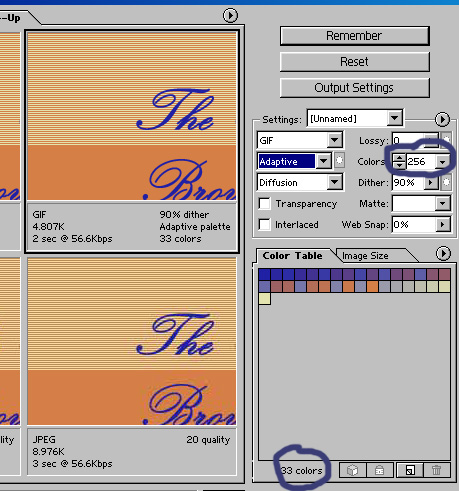 Experiment with changing the number of colors. Note that if your original image did not have very many different colors in it, you may ask for 256 colors, but have far fewer colors actually in use--see the color table. Make sure you try going down below the total number of colors in the original if this is the case...
For demonstration: a data graph (png format)
Your collective comparisons