Photoshop: Photo editing
We'll follow the overall sequence
of image manipulation suggested by Adobe*.
Even better than making changes directly, can be using image
adjustment layers.
Here are lots of large images to experiment on: SST original images
Getting an image in to Photoshop
You can copy an image and paste it into Photoshop, or open a (digital image) file using "File | Open".
- Drag-n-drop: You may be able to use your mouse to drag an image, say off a web page, into the Photoshop work area.
- Copying and pasting:
- With many programs (FireFox, some e-mail programs) you can right-click an image and choose "Copy Image".
- Switch to Photoshop.
- Choose "File | New" and accept the suggested image dimensions.
- Paste the image into your blank image.
Image scaling
 When you open an image the
percentage shown in the window frame indicates whether the image is
being shown at its true size (100%) or is being scaled (usually scaled down). Choose
the magnifying glass tool, and right-click the image to get options to let
you re-scale to true size (1 pixel in your image = 1 pixel on your monitor).
When you open an image the
percentage shown in the window frame indicates whether the image is
being shown at its true size (100%) or is being scaled (usually scaled down). Choose
the magnifying glass tool, and right-click the image to get options to let
you re-scale to true size (1 pixel in your image = 1 pixel on your monitor).
Or, you can:
* Click with the magnifying glass to zoom-in on the image.
* Alt-click (the magnifying glass will show a "minus" sign on it) to zoom-out.
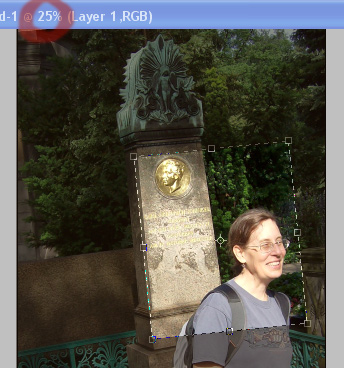
Cropping and straightening
 Use the crop tool to select a portion of your image.
- Click/drag/release to create a rectangular selection (cropping area).
-
Grab the handles to resize the cropping area.
- To rotate the selection (e.g., to line up the cropped image with the horizon, or other horizontal reference line), hold your mouse button down outside the selected area and drag.
- Double-click inside your selection to crop.
Make a mistake? Use Ctrl-Z to undo the last action you took.
Resizing (downsizing) an image
 You can always go from a large image with lots of pixels (= lots of detail)
to a smaller image with fewer pixels (=less detail). However, as this sequence
of images shows, you can't reverse the process because you'd have to invent
detail when moving from few pixels to many pixels.
You can always go from a large image with lots of pixels (= lots of detail)
to a smaller image with fewer pixels (=less detail). However, as this sequence
of images shows, you can't reverse the process because you'd have to invent
detail when moving from few pixels to many pixels.
Before you down-size, you need to have an idea of the the final size (in pixels) that you'd like to end up with...either the height or width.
If you know both height and width you want to end up with, you can specify final dimensions with the crop tool, and crop directly down to the final size.
Down-size with "Image | Image Size". This is also known as re-sampling. You need specify either the height or width, and the other dimension will be calculated for you to preserve the proportions of your content.
Repairing smudges
 The "clone" or "rubber stamp" tool let's you copy pixels from one part of an image to another.
Here's a .jpg scan of an old photo. On the surface of the original photo are some significant smudges. We'll use the rubber stamp tool to correct these.
- Select the rubber-stamp tool.
- Select an appropriate brush size.
- Alt-click on a non-smudged part of the image that is the same color/texture as you'd like the smudged area to be,
- Next move the mouse to the smudged part of the image, hold down the mouse button, and start to "paint" over the smudge.
Sometimes you can hide the fact that you're cloning by using a speckled brush, and cloning in from several different positions in the image, rather than just painting from one part.
What not to do with the clone tool
Here's the photograph that got Adnan Hajj fired from Reuters.
Correcting tonal (light and dark) problems
Over-exposed photo, underexposed
Photo too dark! (or too light)
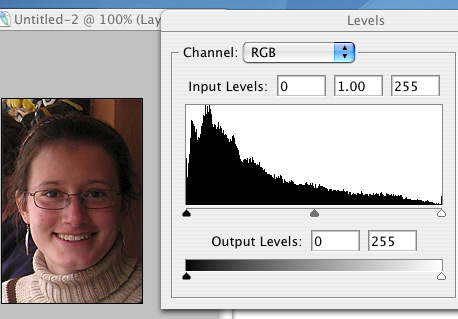
"Gamma correction" is the best way to lighten a photo without distorting the already light or already dark parts. To do this in Photoshop, select "Image | Adjust | Levels". Here's the original image with a gamma value of 1.0:
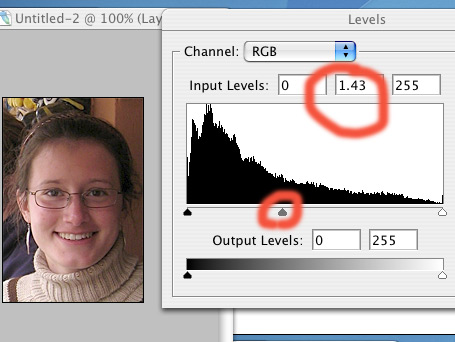
Pull the middle slider to the left (to lighten) until the area in the shadows doesn't look quite so dark:
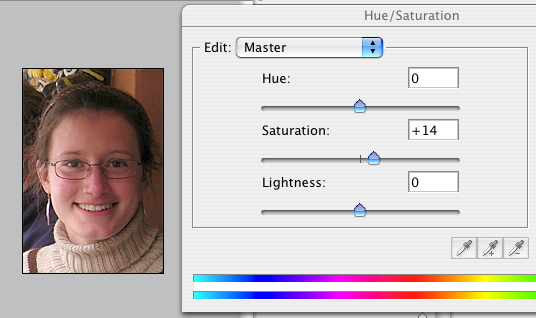
"Washing In"
Lightening may "wash out" the colors, so you can re-saturate colors in the image by going to "Image | Adjustments | Hue/Saturation" and dialing up the saturation a bit.
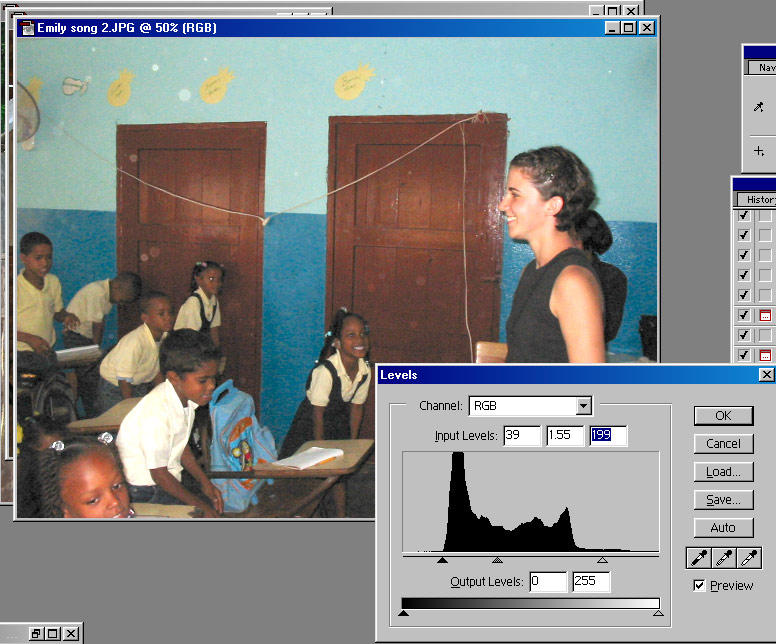
Dull image
The photo below looks dull because (when you go to the "Adjust | Levels" menu) we see that it contains almost no very bright or very dark pixels.
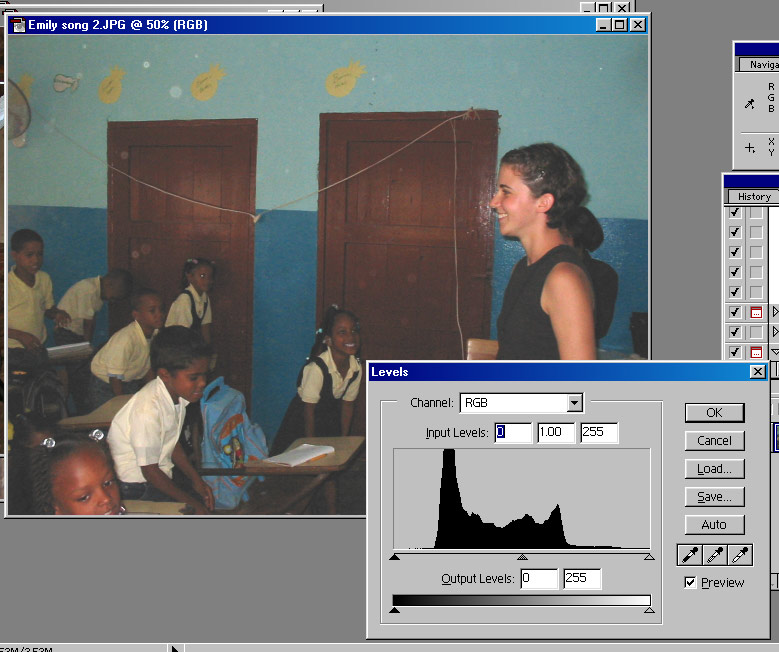
You can increase the dynamic range of an image--that is, 'stretch out' the range of brightness in the image by bringing the far left and far right sliders in to the edges of the image levels spectrum as below. (The median gamma level has also been increased).
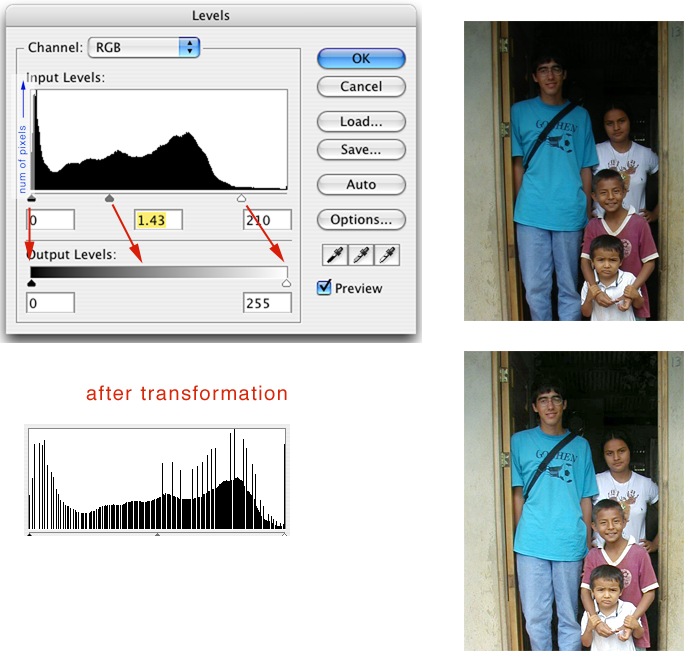
About that graph
The histogram of "levels" shows the number of pixels in the image (y-axis)
vs their brightness.
When you you adjust the sliders, you are stretching/shrinking the statistical
distribution. The right (left) slider indicates the brightness in the original
image that will be set to white (black) in the transformed image. The brightness
at the midway slider position in the original image will end up as the halfway-gray
in the transformed image.
Color balancing
 You
may not always notice that a single image has an "odd" color tint to it: Our
eyes are used to adjusting to a wide variation in illumination. But when several
images are displayed beside each other, it can become painfully obvious when
some color balancing is needed. (Actual screen shot from a GC directory
search, at right).
You
may not always notice that a single image has an "odd" color tint to it: Our
eyes are used to adjusting to a wide variation in illumination. But when several
images are displayed beside each other, it can become painfully obvious when
some color balancing is needed. (Actual screen shot from a GC directory
search, at right).
You might typically do some color balancing after adjusting levels. Access
this menu from "Image
| Adjust | Variations".
Here's a dark, and perhaps overly red image: KentMia.jpg.
Here's what the variations menu looks like
Set the "Fine ... Course" closer to "Fine" and you'll see less drastic variations. You can explore the effect of making the image "greener" or
giving it more in the way of the other color directions.
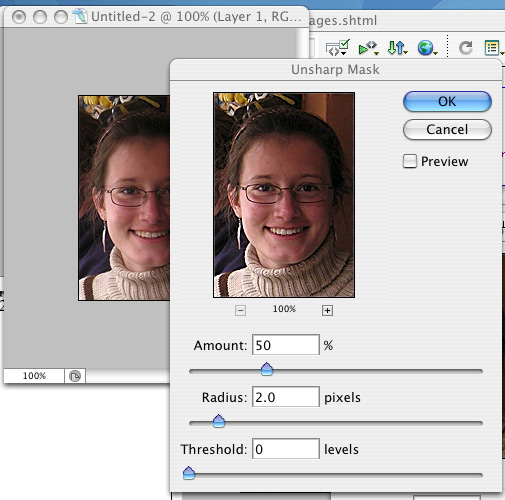
Sharpen your image
 When you down-size an image, Photoshop averages neighboring pixels into one pixel in the new image. This will blur high contrast edges. So, in general you should sharpen an image after you downsize it significantly to get back to a reasonable edge contrast.
Typical Unsharp Mask parameters are around 40-50%, with a radius of 2 pixels and threshold of 0.
Save a web copy of your picture
"File | Save for Web & Devices". At this point you'll see a dialog like the one below. Good general purpose choices for photos are...
- JPEG should be selected as the image format
- Set the quality setting to about '60'

* Article pointed out by Merv Zook.