
Consider an image like this one, ...
Using javascript, a browser can sense when your mouse has 'rolled over'
on top of this image, and then swap the first or "normal"
image for another one, called the "over" image or the "mouseover"
image...
Finally, you can surround this thing with <a href='...'>...</a> tags so that clicking on the image takes you to another page. The whole thing packaged together looks like this...
They can be visually attractive, but they have at least two good information-communication characteristics:
For a rollover effect, you need to prepare (at least) two separate images.
Typically the two images are not completely different from each other, but rather only part of an image is changing. Like claymation, you might imagine that we'll have a starting image, take a snapshot of it, change a little something, then take a second snapshot.
Using Photoshop's layers, it's straightforward to accomplish the "change a little something" step by showing/hiding one layer, so we'll start by preparing a photoshop file in such a way that we can see the two different "states" of the image by just hiding or showing some layers.
Remember that you can turn off the display of individual layers by
clicking and unclicking the little eye beside them in the layer menu...
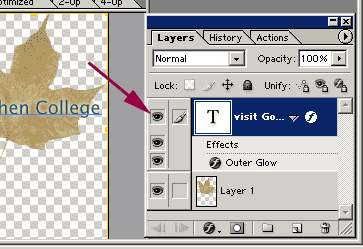
We'll pull the image into ImageReady, and then use it to package the whole thing up as a rollover:
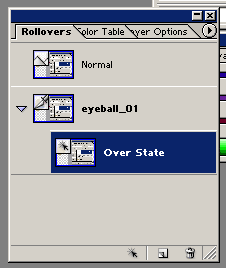
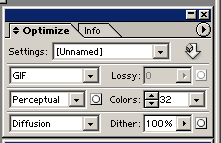
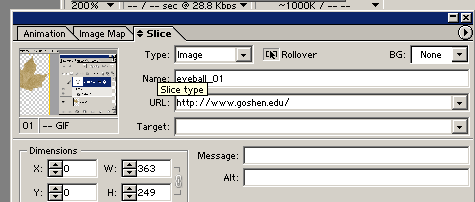
The resulting html file should have a working image rollover. If you'd like to use it in a page of your own you need to copy three things from the web page that IR created:
A single rollover is kind of a neat effect, but you can see perhaps that to create a page with rollovers on several of the links, you're going to have to put a bunch of images together in a table, and this is rapidly going to get complicated. But it turns out that ImageReady can do a lot of this sort of work for you.
You can "sketch" rather complicated layouts in Photoshop, and then use Adobe ImageReady to turn a Photoshop sketch into a working web page "relatively" simply. Then, using yoiur impeccable knowledge of HTML, you can tweak the page that IR generates and get really quite bandwidth friendly pages.
There's a .psd file of that we'll experiment with at w:\deptpages\communication\comm326\imageready\leafpoem\leafpoem.psd. Open it in Photoshop. We'll edit it first in Photoshop, and then bring it in to ImageReady
Schematically, what we'll do...
 Draw
a rectangular "slice" around each part of the image that
we wish to be a rollover with the slice tool. These
are underneath each other on the IR tool palette (at right).:
Draw
a rectangular "slice" around each part of the image that
we wish to be a rollover with the slice tool. These
are underneath each other on the IR tool palette (at right).:After running the IR table to the borders, setting a background body color, replacing some of the slices with transparent gifs, setting the text color to that certain blue, etc, etc, this is what we're heading for....leafpoem-glow-roll. Overall "weight" is 30Kb (about 15Kb is in the lower-left image. The HTML itself is 3Kb). Note that all of this would be cached by the time someone comes to a second page on such a sitelet.
See also: